THE COPPER FOIL TECHNIQUE
 The copper needed for this technique is of a thin, foil-like gauge. It has an adhesive on one side and is backed by protective paper. Copper foil is sold in 33 meter rolls and is available in several widths and gauges. Some of the common sizes used are 4 mm, 4,8 mm, 5,5 mm and 6,4 mm. The actual gauge of the copper can be 1 mil, 1-1/4, or 1-1/2 mil. the thickness of the glass you are using and the finished look you want to achieve will dictate your choice.
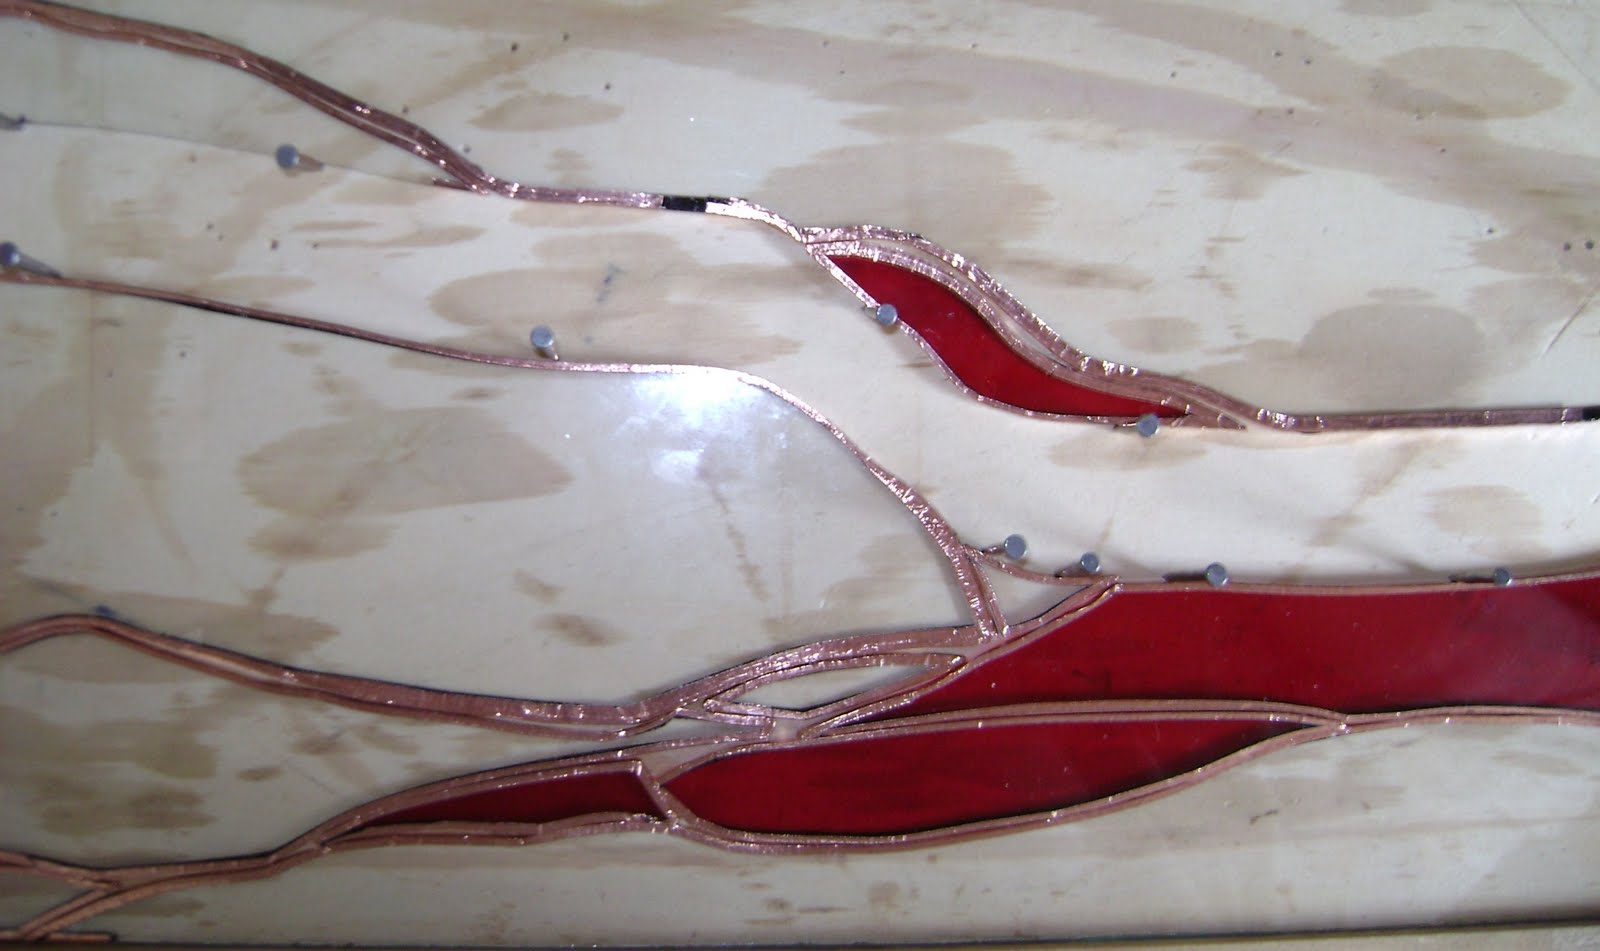
 After all of the pieces of glass in your project are cut and refined to fit properly, you are ready to begin foiling. Every piece of glass must be wrapped in copper foil. Before you begin it is important that your glass is clean and free of dirt and oil from your cutter or the foil will not adhere properly.
Crimp the foil around the edges of the glass. With a blunt piece of wood or a fid, burnish the foil on both sides of the glass and along the outside edge so that the foil adheres to the glass firmly and smoothly. A sloppy wrap job will ruin the appearance and affect the strength of the finished project.
Tip: the warmer the copperfoil and the glass pieces are the better foil will stick to the glass and later during the soldering it will not loosen. Try to work in a place where the temperature is above 20 degrees.
Lining up and soldering your piece
After wrapping and burnishing all of the pieces of glass position them.
 Apply flux to the foiled seam joints. Tack solder to all of the joints in your project. Melt just enough solder onto each joint to hold the pieces firmly together so that they will not slip or slide apart. Neat, skillful soldering is not necessary at this point because during the next step the tacking will be remelted.
Apply flux along the foiled seams of the project that you will be soldering during this work session. If you apply flux to the copper and leave it unsoldered for too long, it will result in badly tarnished, oxidized foil that will be difficult, or impossible to solder without a thorough cleaning. Should this happens, you can remove the oxidation with a soupy mixture of water, vinegar, and table salt. The final soldering step is called "beading." This process involves building up the solder to a uniformly rounded bead along all the seams. Move the iron (with the tip held horizontal to the seam) and the solder continuously along the length of the seam. Remember that you can't bead a seam if you don't use enough solder. Likewise, too much solder will be difficult to uniformly bead. You will get the hang of it and use the proper amount. Bead both sides of your project.
If you are not going to frame your panel in a wooden frame or U lead came, you will want to take the outside edges have a more finished appearance. You now want to bead the perimeter. First apply a very light coat of solder to the perimeter on both sides of the piece. This is called "tinning."Now bead the edges.
If you are not going to frame your project, solder on loops for hanging at this time. Pre-formed circles of brass or copper can be purchased from your supplier or you can make you own simply by curling 18 or 20 gauge brass or copper wire around a dowel.
This method was made popular by L.C. Tiffany at the turn of the century, it involves wrapping the pieces of glass with copper foil and soldering them together along the length of the seams.
Copper foil can be used as an alternative to lead in any instance at the personal preference of the user. It is much stronger than lead when soldered, needs no putty, is waterproof, and allows you to do intricately detailed projects where the bulky look and weight of lead would detract from the aesthetics of a delicate design.

For instance, if you use very wide foil such as 9,5 mm to wrap thin glass, you will have very wide seams in your finished project. Wide foils such as 7,9 mm and 9,5 mm are usually used where strength is an important factor or when very thick glass is being used. Beginners using standard 3 mm thick machine-made stained glass should start with 6,3 mm or 5,5 mm foil. These sizes are easy for the novice to handle. With a little more experience at cutting, you may like the narrow seams that 4,7 mm foil produces. The choice of width and milage is one of personal preference. As you do more stained glass, you will find that you have definite preferences.
The allowance between your pieces of glass using the copper foil method is 0,79 mm. This means that the lines of your pattern should be 0,79 mm thick. This allowance is the space that your copper foil takes up. When cutting using the traditional method, you must cut every piece of glass to the inside of these lines. If you use the paper pattern method this allowance is cut out of the pattern. If you are using a full-size pattern that is drawn with 1,5 mm lines, and using the traditional method, cut slightly to the inside of these lines. Alternatively use a Tiffany scissor, which will cut the correct amount of paper away so you'll end up with a perfect template for cutting glass.
APPLICATION OF COPPER FOIL
Remove the protective paper backing of the foil as you work. First, center the glass on the foil. Make sure that there is an even amount of overhang on each side of the glass. Wrap the foil around each piece of glass, overlapping it at least 5 mm from where you began.
Crimp the foil around the edges of the glass. With a blunt piece of wood or a fid, burnish the foil on both sides of the glass and along the outside edge so that the foil adheres to the glass firmly and smoothly. A sloppy wrap job will ruin the appearance and affect the strength of the finished project.
Tip: the warmer the copperfoil and the glass pieces are the better foil will stick to the glass and later during the soldering it will not loosen. Try to work in a place where the temperature is above 20 degrees.
(the higher temperature the better)
Lining up and soldering your piece
After wrapping and burnishing all of the pieces of glass position them.
 Apply flux to the foiled seam joints. Tack solder to all of the joints in your project. Melt just enough solder onto each joint to hold the pieces firmly together so that they will not slip or slide apart. Neat, skillful soldering is not necessary at this point because during the next step the tacking will be remelted.
 Apply flux along the foiled seams of the project that you will be soldering during this work session. If you apply flux to the copper and leave it unsoldered for too long, it will result in badly tarnished, oxidized foil that will be difficult, or impossible to solder without a thorough cleaning. Should this happens, you can remove the oxidation with a soupy mixture of water, vinegar, and table salt.
 The final soldering step is called "beading." This process involves building up the solder to a uniformly rounded bead along all the seams. Move the iron (with the tip held horizontal to the seam) and the solder continuously along the length of the seam. Remember that you can't bead a seam if you don't use enough solder. Likewise, too much solder will be difficult to uniformly bead. You will get the hang of it and use the proper amount. Bead both sides of your project.
 If you are not going to frame your panel in a wooden frame or U lead came, you will want to take the outside edges have a more finished appearance. You now want to bead the perimeter. First apply a very light coat of solder to the perimeter on both sides of the piece. This is called "tinning."
If you are not going to frame your project, solder on loops for hanging at this time. Pre-formed circles of brass or copper can be purchased from your supplier or you can make you own simply by curling 18 or 20 gauge brass or copper wire around a dowel.
Wash your project in warm water and mild detergents to remove the flux or use a commercially prepared flux remover. You are now ready to apply patina to the solder. Patina changes the silver color of the solder to an antique black or copper. Commercially approved chemical mixtures are available. Wear rubber gloves to protect your hands from the chemicals, and follow the directions on the label. When finished, wash and dry your panel.
Fred Hebing
Fred Hebing
No comments:
Post a Comment